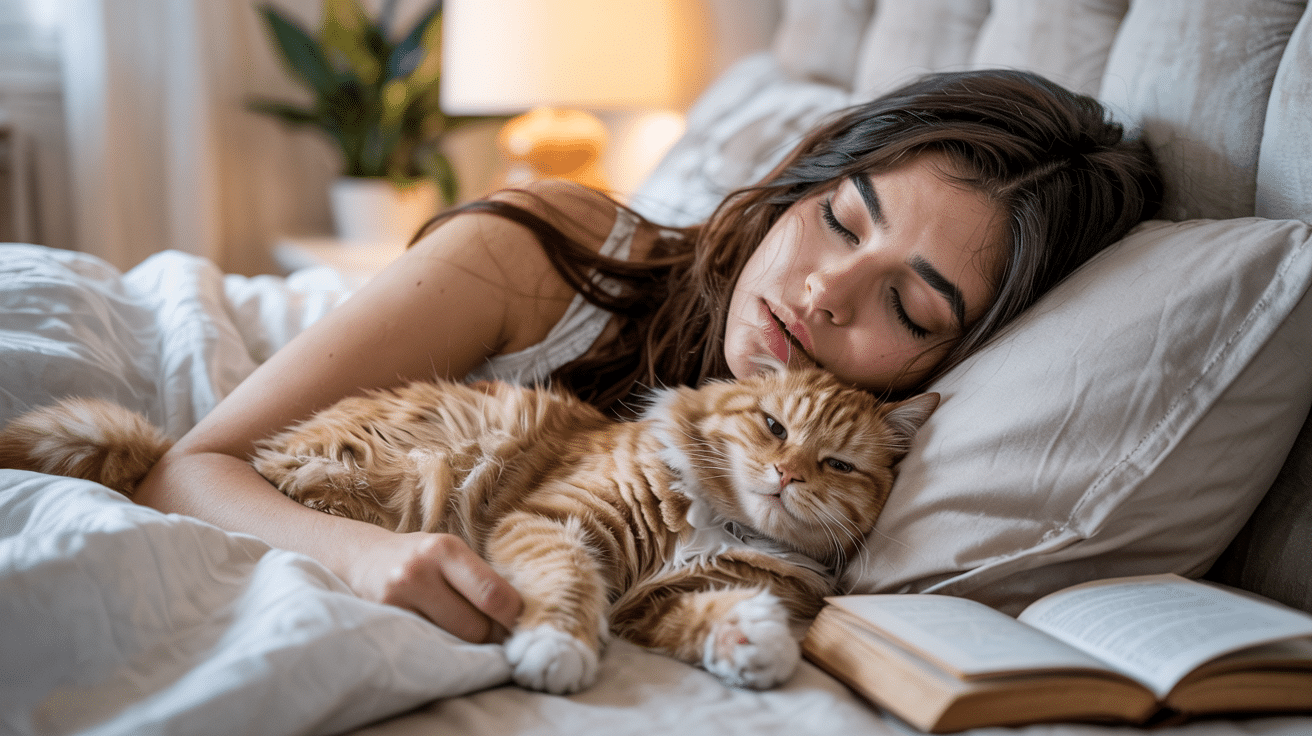
Is your indoor cat going a bit stir-crazy? Do they jump on your kitchen counters or scale your furniture? Cats naturally love to climb, and they need vertical space just as much as floor space.
The good news? You can build them a special climbing wall that keeps them happy and active!
In this guide, I’ll show you exactly how to build a cat climbing wall that works in any home—yes, even if you rent! You’ll learn the best materials to use, easy mounting tricks, and design ideas that both you and your cat will love.
So, let’s build your feline friend something special!
Why Build a Cat Climbing Wall?
Cats love to climb. It’s in their nature to want high spots where they can watch over their territory. A climbing wall gives your furry friend a chance to jump, stretch, and play in ways that keep them happy and healthy.
When cats get to move their bodies and use their natural climbing skills, they stay fit and feel less stressed. This is really helpful for indoor cats who don’t get to climb trees outside.
You don’t need a big home for this project. A climbing wall takes up vertical space instead of floor space, making it perfect for apartments or small homes.
Plus, making your own wall costs much less than buying those big cat towers from pet stores. You can create something that fits your home and your cat’s needs without spending a ton.
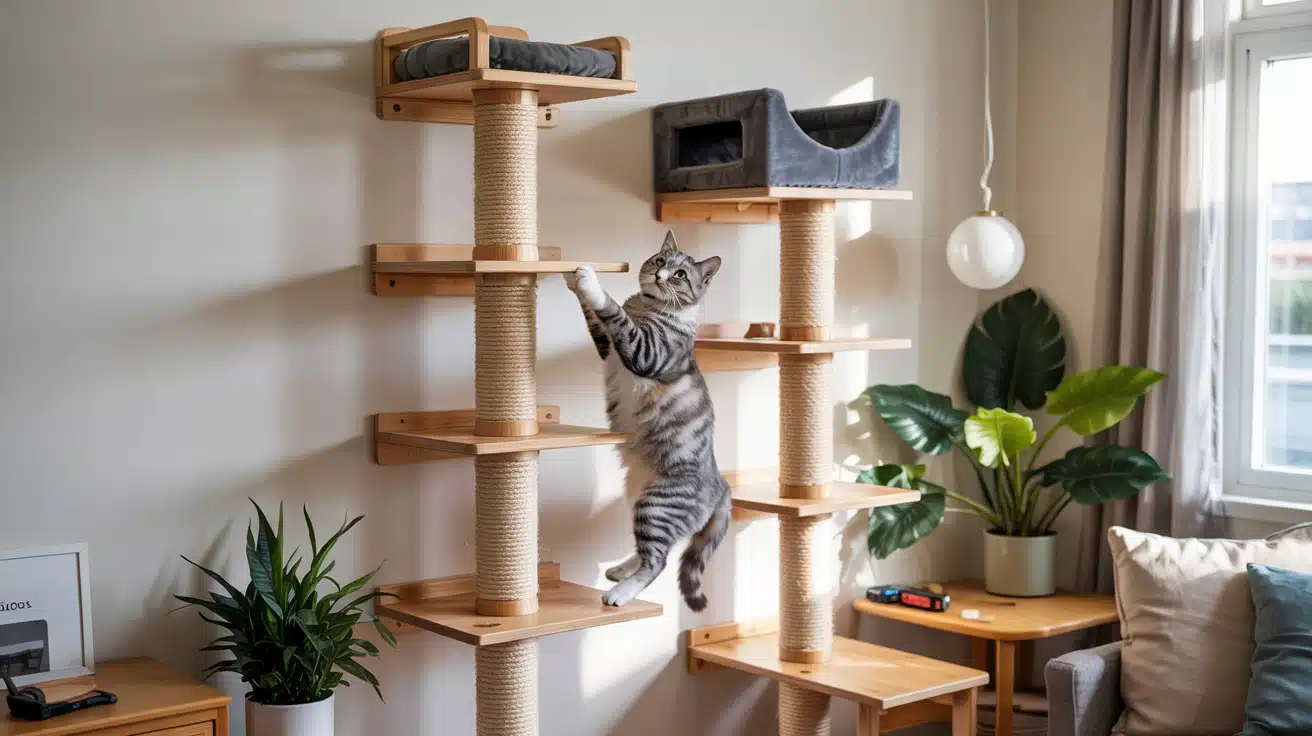
Steps to DIY a Cat Climbing Wall
Creating a climbing wall for your cat might sound tricky, but it’s actually a fun weekend project. We’ll guide you through each step so you can build a safe play space your cat will love.
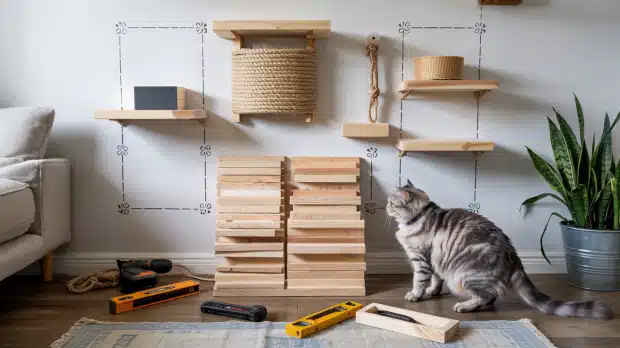
Materials Required
All you need for your climbing wall are some basic tools and materials, and a bit of patience!
- Several wooden shelves (12″ x 8″ works well)
- Strong L-brackets or floating shelf brackets
- Screws appropriate for your wall type
- Drill and drill bits
- Stud finder
- Level
- Measuring tape
- Carpet remnants or sisal rope for traction
- Fabric glue or staple gun
- Command strips (for renters)
- Cat toys to attach to the wall
Step 1 – Plan Your Layout
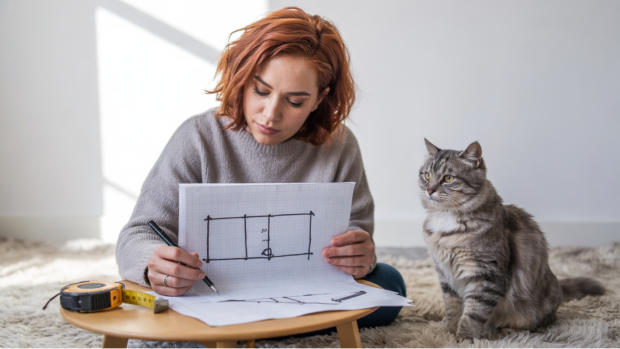
Start by watching how your cat moves around your home. Where do they like to perch? How high can they jump?
Grab some paper and sketch out ideas based on your cat’s habits and your wall space.
Measure your ceiling height to know your limits.
Step 2 – Prepare the Wall and Materials
Clean your workspace and gather all your tools first.
Sand any rough edges on wood pieces to keep your cat’s paws safe.
Pre-cut platforms and steps if needed, or ask the hardware store to cut them for you to save time.
Step 3 – Mounting the Shelves and Features
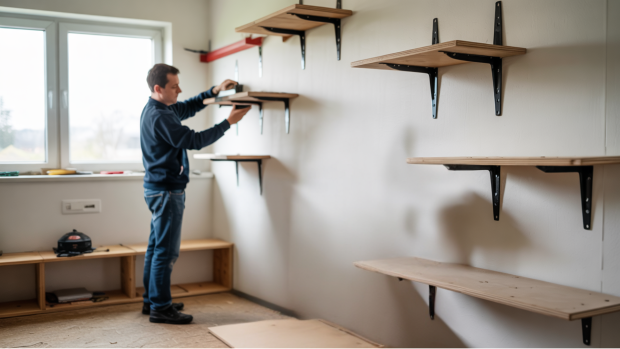
Find wall studs using a stud finder for secure mounting. If you rent, consider command strips or brackets that won’t damage walls.
Drill pilot holes to avoid wood splitting.
Start low and work your way up, testing each piece before adding the next one.
Step 4 – Test for Safety and Introduce Your Cat
Push on each platform to check if it holds your cat’s weight. Place treats on different levels to spark interest.
For shy cats, sit nearby and offer praise as they first try it out. Some cats need time to build courage for higher spots.
Choosing the Right Location
Finding the perfect spot for your cat wall matters more than you might think.
Your cat will be happier and use the wall more if you pick a location that matches their natural instincts. Plus, the right spot means your wall will be safer and last longer.
Corners, Doors, and Windows
Cats love watching over their domain from a safe corner spot. The two walls meeting create natural security that makes cats feel protected.
Near windows, your cat can soak up sunshine and watch birds outside. Doorways offer great spots for cat bridges that let them cross from one side to another.
Studs and Support
Your cat wall needs to be rock-solid.
Find the wooden studs in your wall – they’re usually spaced 16 or 24 inches apart. Run your stud finder along the wall and mark each stud with a bit of tape.
This simple step saves you from having shelves that pull out of the wall when your cat jumps on them.
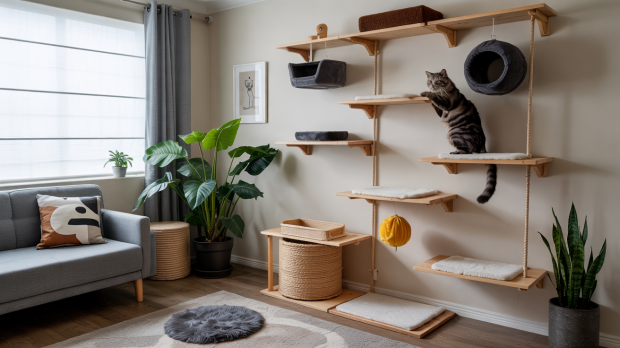
DIY Cat Wall Designs and Layout Ideas
Not sure how to design your cat wall? Don’t worry! We’ve got some ideas that will work for different homes and cats.
The best part is that you can mix and match these designs to create something your cat will actually use and that you’ll be happy to have in your home.
For Small Apartments
When space is tight, think upward!
Try a narrow zigzag pattern of small shelves going up your wall. Door-mounted options work great too – you can attach platforms to the back of a door.
This gives your cat climbing fun without taking up your limited floor space.
For Big Cats or Multiple Pets
Bigger cats need stronger supports! Choose wider platforms (at least 12 inches) so your cat can fully sit or lie down.
Use extra brackets for each shelf to handle more weight. Space the platforms closer together so heavier cats can jump easily between levels.
Aesthetic or Stylish Designs
Your cat wall can look good too!
For a clean look, try white or natural wood shelves against a bright wall. Rustic designs with branch-like perches bring the outdoors in. Minimal designs with hidden brackets keep things sleek.
Match the wood tone to your furniture for a put-together look.
Features and Adjustments You Could Add
Once you’ve built your basic cat wall, you might notice ways to make it even better. Watching how your cat uses the wall will give you ideas for improvements.
These tweaks can make the wall safer, more fun, and better suited to your cat’s specific likes and habits.
Blocking Routes for Safety
Some spots in your home aren’t safe for cats to reach.
Place blocking panels near fragile items or electronics. You can create “dead ends” by spacing shelves too far apart.
A small fabric barrier can also signal to your cat that a path is off-limits.
Add Incentives
Make those high spots extra special!
Hang feather toys from higher shelves that swing when batted. Put a comfy bed on a wide platform where sunlight hits. Even placing treats on new shelves can help shy cats try out the climbing wall.
Modify Based on Behavior
Pay attention to which paths your cat likes best. If they skip certain shelves, try moving them.
When your cat stretches too much between platforms, add a middle step. The beauty of a DIY wall is that you can change it as you learn what works.
Conclusion
Building a cat climbing wall might take a weekend of work, but the joy it brings to your home is worth every minute. Your furry friend gets a special place made just for them, and you get to watch them leap, play, and rest in their new cozy spots.
Remember that your first design doesn’t have to be perfect. Start small, see how your cat uses it, and make changes as you go.
I hope this guide has given you the push you need to try this project. Your cat can’t thank you with words, but when you see them happily using their new climbing wall, you’ll know you’ve done something wonderful for them.